Pages

Showing posts with label Recipes. Show all posts

Friday, 15 February 2013

Chicken and Tarragon Pies

Everyone has a go to dish that you know can be relied upon to impress. For me it is absolutely my Chicken and Tarragon Pies they are amazing!
 
Recipe makes 4 pies
 
I started by softening 6 baby leeks and 1 large onion in a saucepan. When really soft add 4 skinless and bonesless chicken thighs chopped into quarters, add 175ml of white wine (nothing fancy) and leave until reduced by 1/3, add 200ml of hot (really important!) chicken stock and leave until reduced by 1/2, this should take about 10 minutes on a low heat……
 
…pour 150ml double cream into a jug, add a handful of roughly chopped tarragon and season, add to the pan, bring to the boil and then simmer for 6 minutes.
 
Transfer the mixture into ramekins and leave to completely cool, add your pastry lids (remebering to snip a hole in each one to let the steam escape) glaze with milk and bake at 220 for 25 minutes. ENJOY!


Wednesday, 7 November 2012

Recipe: Chicken and Tarragon Vegetable Pie

As the winter draws in and the nights get colder there can be only one solution: Pie.
When it comes to pies, it has to be savoury for me, and the king of one pot dinner pies is surely the classic Chicken and Tarragon. Here's how I made mine.
 
Chicken and Tarragon Vegetable Pie (Serves 2 hungry adults) You will need:


  • 4 medium skinless and boneless chicken thighs (you can use breast but it tends to be quite dry when cooked for so long)
  • 4 medium celery sticks
  • 5 baby leeks - don't use normal leeks they're too tough
  • 1 small onion or 3 shallots
  • 1/2 a small pot of double cream
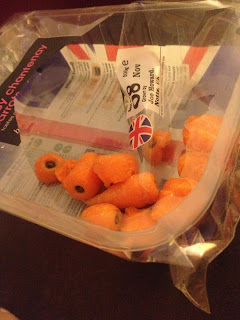
  • baby chantenay carrots - about a 2/3 of a standard packet
  • Handful of English Tarragon
  • Chicken Stock (I use a cube made up with water)
  • 1 sheet of pre made and pre-rolled puff pastry (unless you're feeling brave) I used a 'light' reduced butter version which made me feel better about the cream!
  • 1-2 cloves of Garlic
  • Salt and Pepper to season
Start by chopping - once you have started this off it moves quite quickly so chop your celery, carrots, leeks and onion/shallot into casserole sized chunks (nothing fancy) and the same with the chicken.
 
Take your largest saucepan and heat about a tablespoon of non flavoured oil - vegetable is fine but rapeseed is better. Once the oil is hot add in your chicken and cook for about 4 minutes, moving it round constantly (the oil will be really hot and the chicken will stick)
 
 
Once the chicken is mostly white (but not cooked through) put into a bowl and put to one side.
 
 
Without cleaning the saucepan - very important. Add in all of your veg, the garlic, salt and pepper and sweat for about 5 minutes.
 
 
Add the chicken and leave for a further 5 minutes
 
 
Pour in the stock, cream and the tarragon - leave to simmer for 10 minutes.
 
 
Once 10 minutes has passed transfer your mixture into a suitable sized glass or ceramic ovenproof dish. Set aside and leave to cool completely to room temperature.
 

When the mixture is totally cool, roll across your puff pastry sheet and squish the sides down under the lip of your dish. Decorate as you wish or not at all.

 
Bake at 200 degrees for 30 minutes - Do not leave in the oven for 30 minutes without turning the bugger on as I did!
Remove once golden brown
 
 
Devour
 

Bonus - Leftover carrots make an excellent emergency snack once you've run out of halloween sweets.


Monday, 8 October 2012

Simply Italian - Pasta Making

After discovering Michela Chiappa's Simply Italian programme at 3am on 4OD I became obsessed with the idea that I too could be an authentic italian chef. Michela makes everything look so neat and easy and trouble free that I couldn't not give something a go and Pasta was first on my list to try.


The basics of pasta making are really easy to remember and there are 3 golden rules.
1) 100g of '00' grade flour and 1 egg per person (you can use plain baking flour but 00 flour is much finer and therefore easier to work with)
2) If your mixture is too dry, add olive oil and knead - repeat until it combines. If your mixture is too wet add flour
3) Never use flour to stop the pasta sticking to your work surface, it will make the dough too dry and will also make the end result pasta taste odd.
 
So starting with your 100g of flour tip into a mountain shape onto a dry wooden board. (It's really handy to find a cup or mug that you know is 100g so you don't have to measure each time)


Make a well in your mountain (so it looks like a volcano!) and crack one egg into the hole.


Sprinkle salt over the egg and then using a fork mix the egg with the flour and once it's mostly combined get your hands dirty and start to combine and knead. This is the only difficult part, it's tricky to get the mixture not too wet and not too dry, I found the key here to be the egg - it needs to be a really fresh, and very large egg. If you only have small eggs do not make pasta!
 
The difference is quite drastic, my first attempt with a small egg is on the left, it was too dry so I added oil (you can see its much yellower as a result) and then the dough wouldn't combine and just crumbled, the second attempt on the right was with a large egg and it worked perfectly!
 
 
Once your dough is combined cover with clingfilm and rest for 30 minutes.
 
Once rested, squish the dough out so it's flat and then with your rolling pin work the dough so it's about the thickness of 1-2 playing cards. Remember, do not flour the board or the rolling pin!
 
 
Once the right thickness, use a knife or pastry cutter if you have one to cut small rectangles (this is for farfalle, if making another type of pasta, cut to the corresponding shape!)


Get your rectangle and pinch the top and bottom sides together to make a bow shape..


Put your bows to one side and leave to dry for 15 minutes. Michela recommends using semolina to stop them sticking, I didn't have any so just left them as they were and they were fine!


Once dried you can either cook immediately or store in an airtight container for upto 2 months.
I cooked mine straight away, 1 litre of salted boiling water for 5 minutes..


In summary; it was good fun and i'm pleased I did it, but I only would make pasta again for a special occasion. It was just too time-consuming! But thank you Michela for the inspiration and I will be making more of your recipes soon.


Saturday, 22 September 2012

Apple Cake - a Bradley family recipe

Yesterday I made my mothers Apple Cake and thought I would share the recipe - its a wonderful stodgy satisfying pudding that is always our go to when we need a sugary carb fix - I had mine with custard (Bird's of course!) which is perfect on a chilly autumn evening.

My mum's recipe book is well loved as you can see! She isn't one for writing huge amounts of details so I must admit I did have to laugh when the first line was 'mix ingredients together'


Weigh out 2oz of plain baking lard (please don't use butter, this cake needs lard!) and 6oz of granulated sugar, cream together just as you would with a normal butter mix. The lard should have been left out of the fridge for at least an hour before you start.
 
Once creamed, add one large (pre-beaten) egg and mix in. Please don't expect the mixture to be lump free, when baking with lard you will NEVER be free from lumps but they will cook out during the bake!
 
 
Next you need to mix a batter by adding 6oz of self-raising flour and 4 fl oz of semi-skimmed milk. This is quite hard to do because there's an awful lot of flour and not a great deal of liquid, it's easiest to do this in two half and half stages!
 
 
Once you have your batter, pour into a round, square or loaf cake tin (ensure the tin is lined with greaseproof or teflon)


You may have noticed that there's no apple in the cake as of yet.. fear not.
You'll need two large green cooking apples - technically they should be peeled (I forgot but it was still fine!) you need to core and segement them, if you have one of these amazing contraptions from IKEA it won't take you more than 10 seconds. Layer the segments on top of the batter so the entire cake is covered.. don't leave any gaps and don't push the segments into the batter just let them sit on top.


Once the segments are layered mix 1tbsp of sugar with 1tbsp ground cinammon and cover the top (I went a bit OTT but it was still delicious!)


Bake at 190 (Gas Mark 5) for 30 minutes


Serve hot with cream/custard/a cup of tea!
 
 
Bliss.